How do I manage my Inventory?
Inventory management or tracking is one of the most important back-end aspects of business. By tracking , you know exactly how many units you’ve sold and more importantly, how much stock you currently have. Inventory management is necessary not only to track your inventory, but also to exercise effective cost control. ZapERP’s inventory management system was designed to assist you in managing your inventory, as well as controlling costs wherever possible.
Here’s how you can manage your inventory, using ZapERP’s innovative inventory management system:
Step 1 – Creating an Account with ZapERP.
The first logical step for managing your inventory with ZapERP would be to create an account. While ZapERP is a paid service, there is also a free 6-month trial period for those on the fence.
Fill in all the required fields, such as Company Name, Name, email address, and a secure password.
After you’ve filled in these details, you will have to verify your email address through a link sent to your registered email. Once you login through that link, your account is activated.
When you first signup to ZapERP, you will be asked for company details, such as Company Name, and Address Lines (i.e., address, city, state, country, etc.) It is entirely up to you when you want to finish this process – non-completion does not interfere with your work.
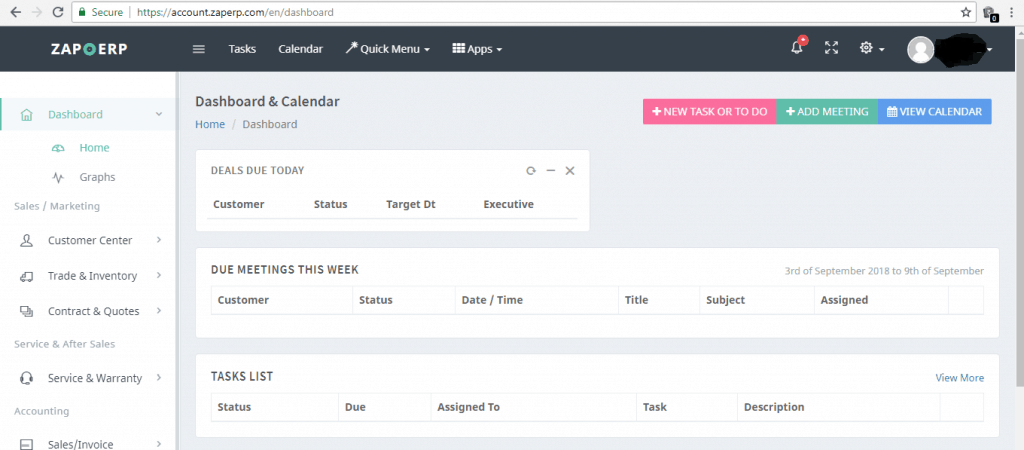
Once you’re done registering, you’ll be redirected to ZapERP’s main dashboard. Here, you’ll find a lot of components aimed at making your business less complicated.
Now without any further ado, let’s learn how to manage with ZapERP.
Step 2: Go to Trade & Inventory.
ZapERP’s intuitive user interface makes it easier for you to navigate around. You should be able to find “Trade & Inventory” with little to no efforts.
When you click on Trade & Inventory, you’ll see sub-options, such as:
- Inventory
- Purchase Orders
- Create PO
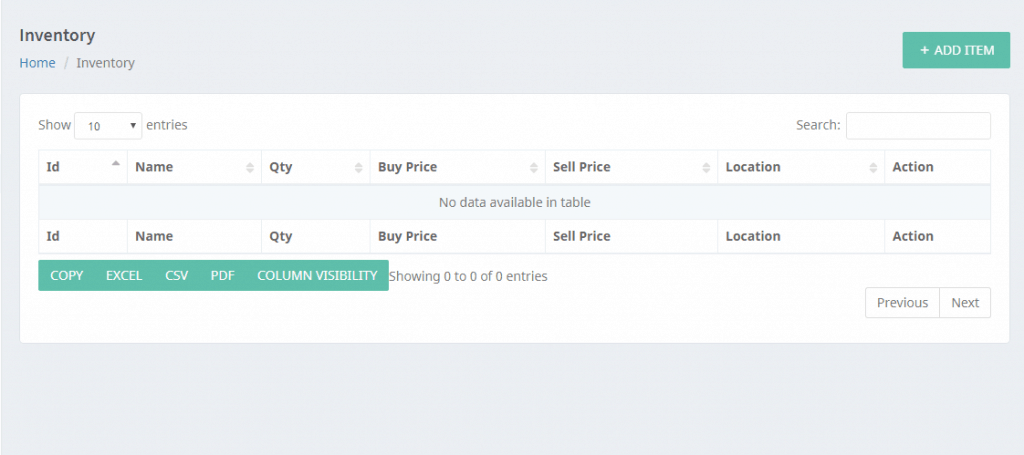
For inventory management, you should click on “Inventory”.
Step 3: Let’s manage !

To proceed further, click on “Add Item”, on the top right corner of your screen.
This is what it should look like:

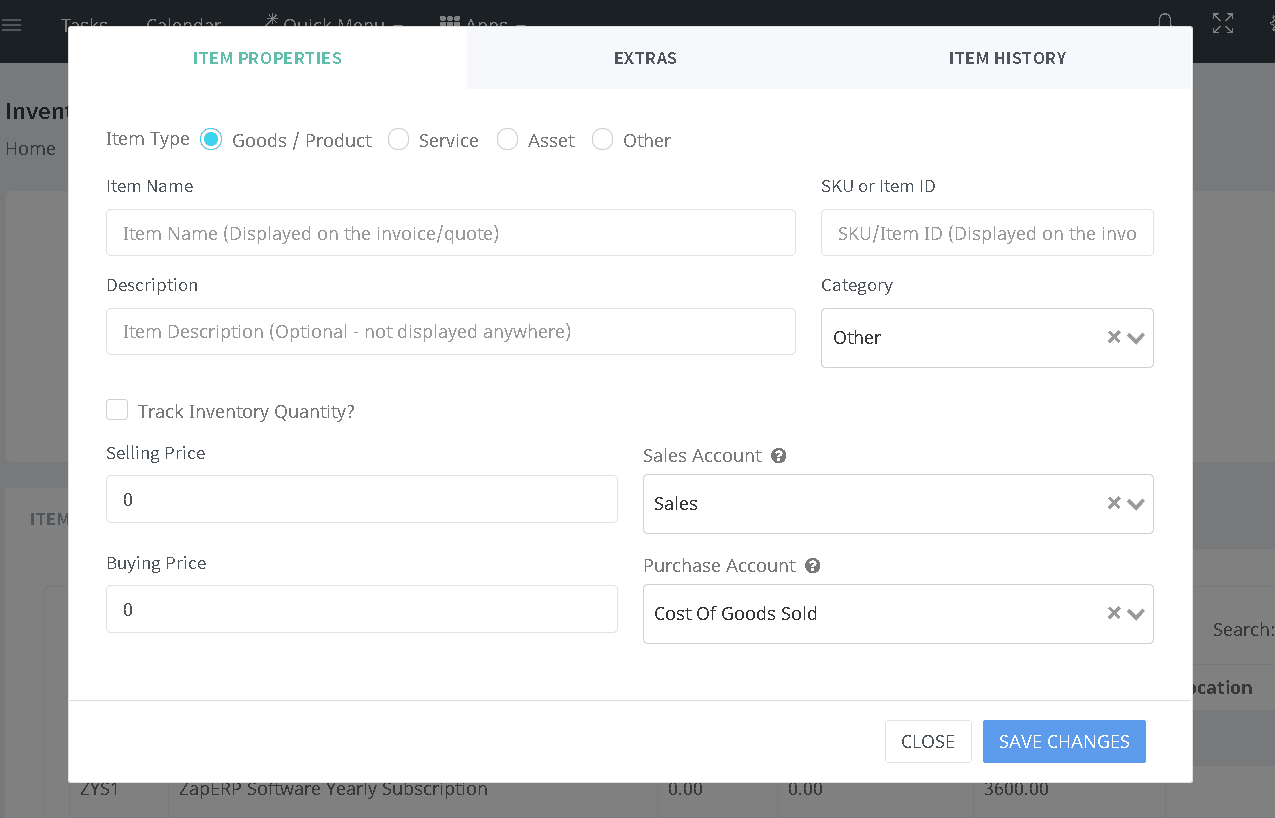
In “Item Description”, the following fields are relevant:
- Item ID/Code: Mention the unique ID of the item you want to add.
- Name: Mention the name of the item you want to include in inventory.
- Description: You can also choose to add a small description of your item. Note that this description will not be displayed elsewhere.
Awesome Feature : You can even see the history of your item using the Item History Tab .
Step 4: Enter all required details, such as Item ID, Item Name, Description, etc.
Step 5: Tick the box which says, “Track inventory quantity?”. This will track your inventory as you keep depleting your stock through sales.
Step 6: Mention the “Buy Price” as well as “Sell Price”.
This gives you an idea of your breakeven point, as well as help you control costs to remain profitable.
Step 7: Go to “Extras” in the same dialogue box.

In Category & Type, choose the most relevant option. If you don’t find anything close to what you want, select “other”.
HSN & SAC relates to your company’s tax details. If your business is based in India, you should ideally choose GST (Goods & Services Tax).
Step 8: Click on Save Changes. That’s it, you’ve just set up your first inventory item through ZapERP!
That’s how simple the process is, really.


 Start using ZapInventory today
